지난 몇 년간 많은 Monitoring Tool을 사용해 오면서 그중 가장 간결하고, 빠르게 적용 할 수 있는 Monitoring Tool(Influxdb, Telegraf, CloudWatch, Grafana)을 소개하고 AWS와 On-premise의 통합 모니터링 사이트 구축 방법을 공유하기 위해서 작성하였습니다.
Monitoring Tool
- Influxdb
- Go 언어로 작성되어 외부 의존성이 없습니다.
- 다양한 API, HTTP(S)를 제공한다.
- 시계열 데이터베이스로 시간 순서에 따라 저장하고 조회하는 기능으로 인해 실시간 비교가 필요한 모니터링에 적합합니다.
- Telegraf
- Go 언어로 작성되어 외부 의존성이 없습니다. (Influxdb와 동일한 업체에서 개발)
- 다양한 매트릭을 수집하여 데이터베이스로 보내는 에이전트입니다.
- 다양한 메트릭을 수집하기 위해 수많은 In-Out Put 플러그인을 제공합니다.
- CloudWatch
- AWS에서 운영되고 있는 서비스를 모니터링을 할 수 있게 해주는 서비스입니다.
- 별도의 CloudWatch Agent를 다운받아서 On-premise에서 운영이 가능합니다.
- 별도 다운받아 사용 할 수 있듯 커스텀 매트릭 설정이 가능합니다.
- Grafana
- 수집된 매트릭에 대한 자료를 한눈에 볼 수 있도록 시각화를 지원합니다.
- 수많은 대시보드 템플릿 및 데이터 소스(Influxdb, CloudWatch, ETC.)를 지원합니다.
Monitoring Installation (OS: Ubuntu18.04)
- apt-get 패키지 설정
sudo add-apt-repository "deb <https://packages.grafana.com/oss/deb> stable main"
curl <https://packages.grafana.com/gpg.key> | sudo apt-key add -
- Install
sudo apt-get update && sudo apt-get install grafana
- 설정
systemctl daemon-reload # 설정 반영
systemctl start grafana-server
systemctl status grafana-server
systemctl enable grafana-server.service # 부팅시 활성화
- 웹페이지
- http://34.220.10.205:3000/login
- ID, PW : admin/admin
- apt-get 패키지 설정
curl <https://repos.influxdata.com/influxdb.key> | sudo apt-key add -
source /etc/lsb-release
echo "deb <https://repos.influxdata.com/${DISTRIB_ID,,}> ${DISTRIB_CODENAME} stable" | sudo tee /etc/apt/sources.list.d/influxdb.list
- Install
sudo apt-get update && sudo apt-get install influxdb
- 설정
systemctl start influxdb systemctl status influxdb systemctl enable influxdb
- Download
(모니터링 대상 서버의 패키지 관리를 위해 다운로드 형식으로 진행)
wget <https://dl.influxdata.com/telegraf/releases/telegraf_1.12.2-1_amd64.deb>
- Install
sudo dpkg -i telegraf_1.12.2-1_amd64.deb
- 설정
systemctl start telegraf
systemctl status telegraf
systemctl enable telegraf
- Setup-Policy (AWS > IAM > Policies > Create policy > JSON)
{ "Version": "2012-10-17", "Statement": [ { "Sid": "AllowReadingMetricsFromCloudWatch", "Effect": "Allow", "Action": [ "cloudwatch:DescribeAlarmsForMetric", "cloudwatch:ListMetrics", "cloudwatch:GetMetricStatistics", "cloudwatch:GetMetricData" ], "Resource": "*" }, { "Sid": "AllowReadingTagsInstancesRegionsFromEC2", "Effect": "Allow", "Action": [ "ec2:DescribeTags", "ec2:DescribeInstances", "ec2:DescribeRegions" ], "Resource": "*" }, { "Sid": "AllowReadingResourcesForTags", "Effect" : "Allow", "Action" : "tag:GetResources", "Resource" : "*" } ] }
- Setup-Access Key (AWS > IAM > User >)
- Access Type: Programmatic access
- Set permissions: Attach existing policies directly
- Filter policies: 1번에서 생성한 Policy Name 등록
- Create User: Download.csv (credentials.csv)
Monitoring Setup
Grafana Datasources Setup & Monitoring Agent(Telegraf)
Influxdb Config Setup (/etc/influxdb/influxdb.conf)
[http]
enabled = true # 활성화
bind-address = ":8086" # 활성화
Grafana 웹페이지 > datasources > Add data source

HTTP (localhost = Public IP(34.220.10.205))

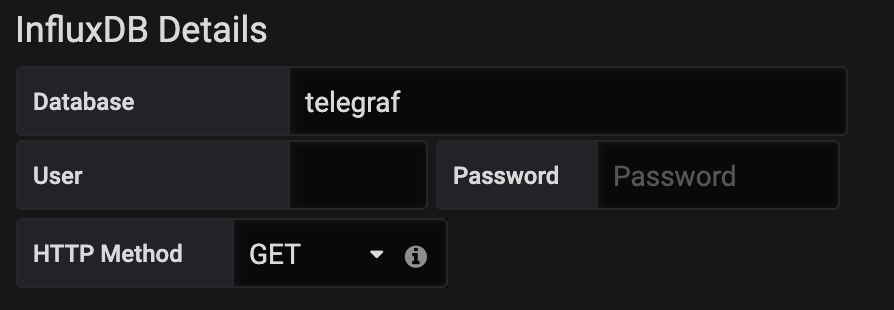
Database (기본 설정 사용 패스워드 미 설정)

CloudWatch Setup (AWS AccessKey)
Grafana 웹페이지 > datasources > Add data source AccessKey 등록
Telegraf Setup (/etc/telegraf/telegraf.conf)
[[outputs.influxdb]]
urls = ["<http://34.220.10.205:8086>"] # 활성화
database = "telegraf" #활성화
systemctl restart telegraf
systemctl status telegraf
Monitoring Dashboard Setup
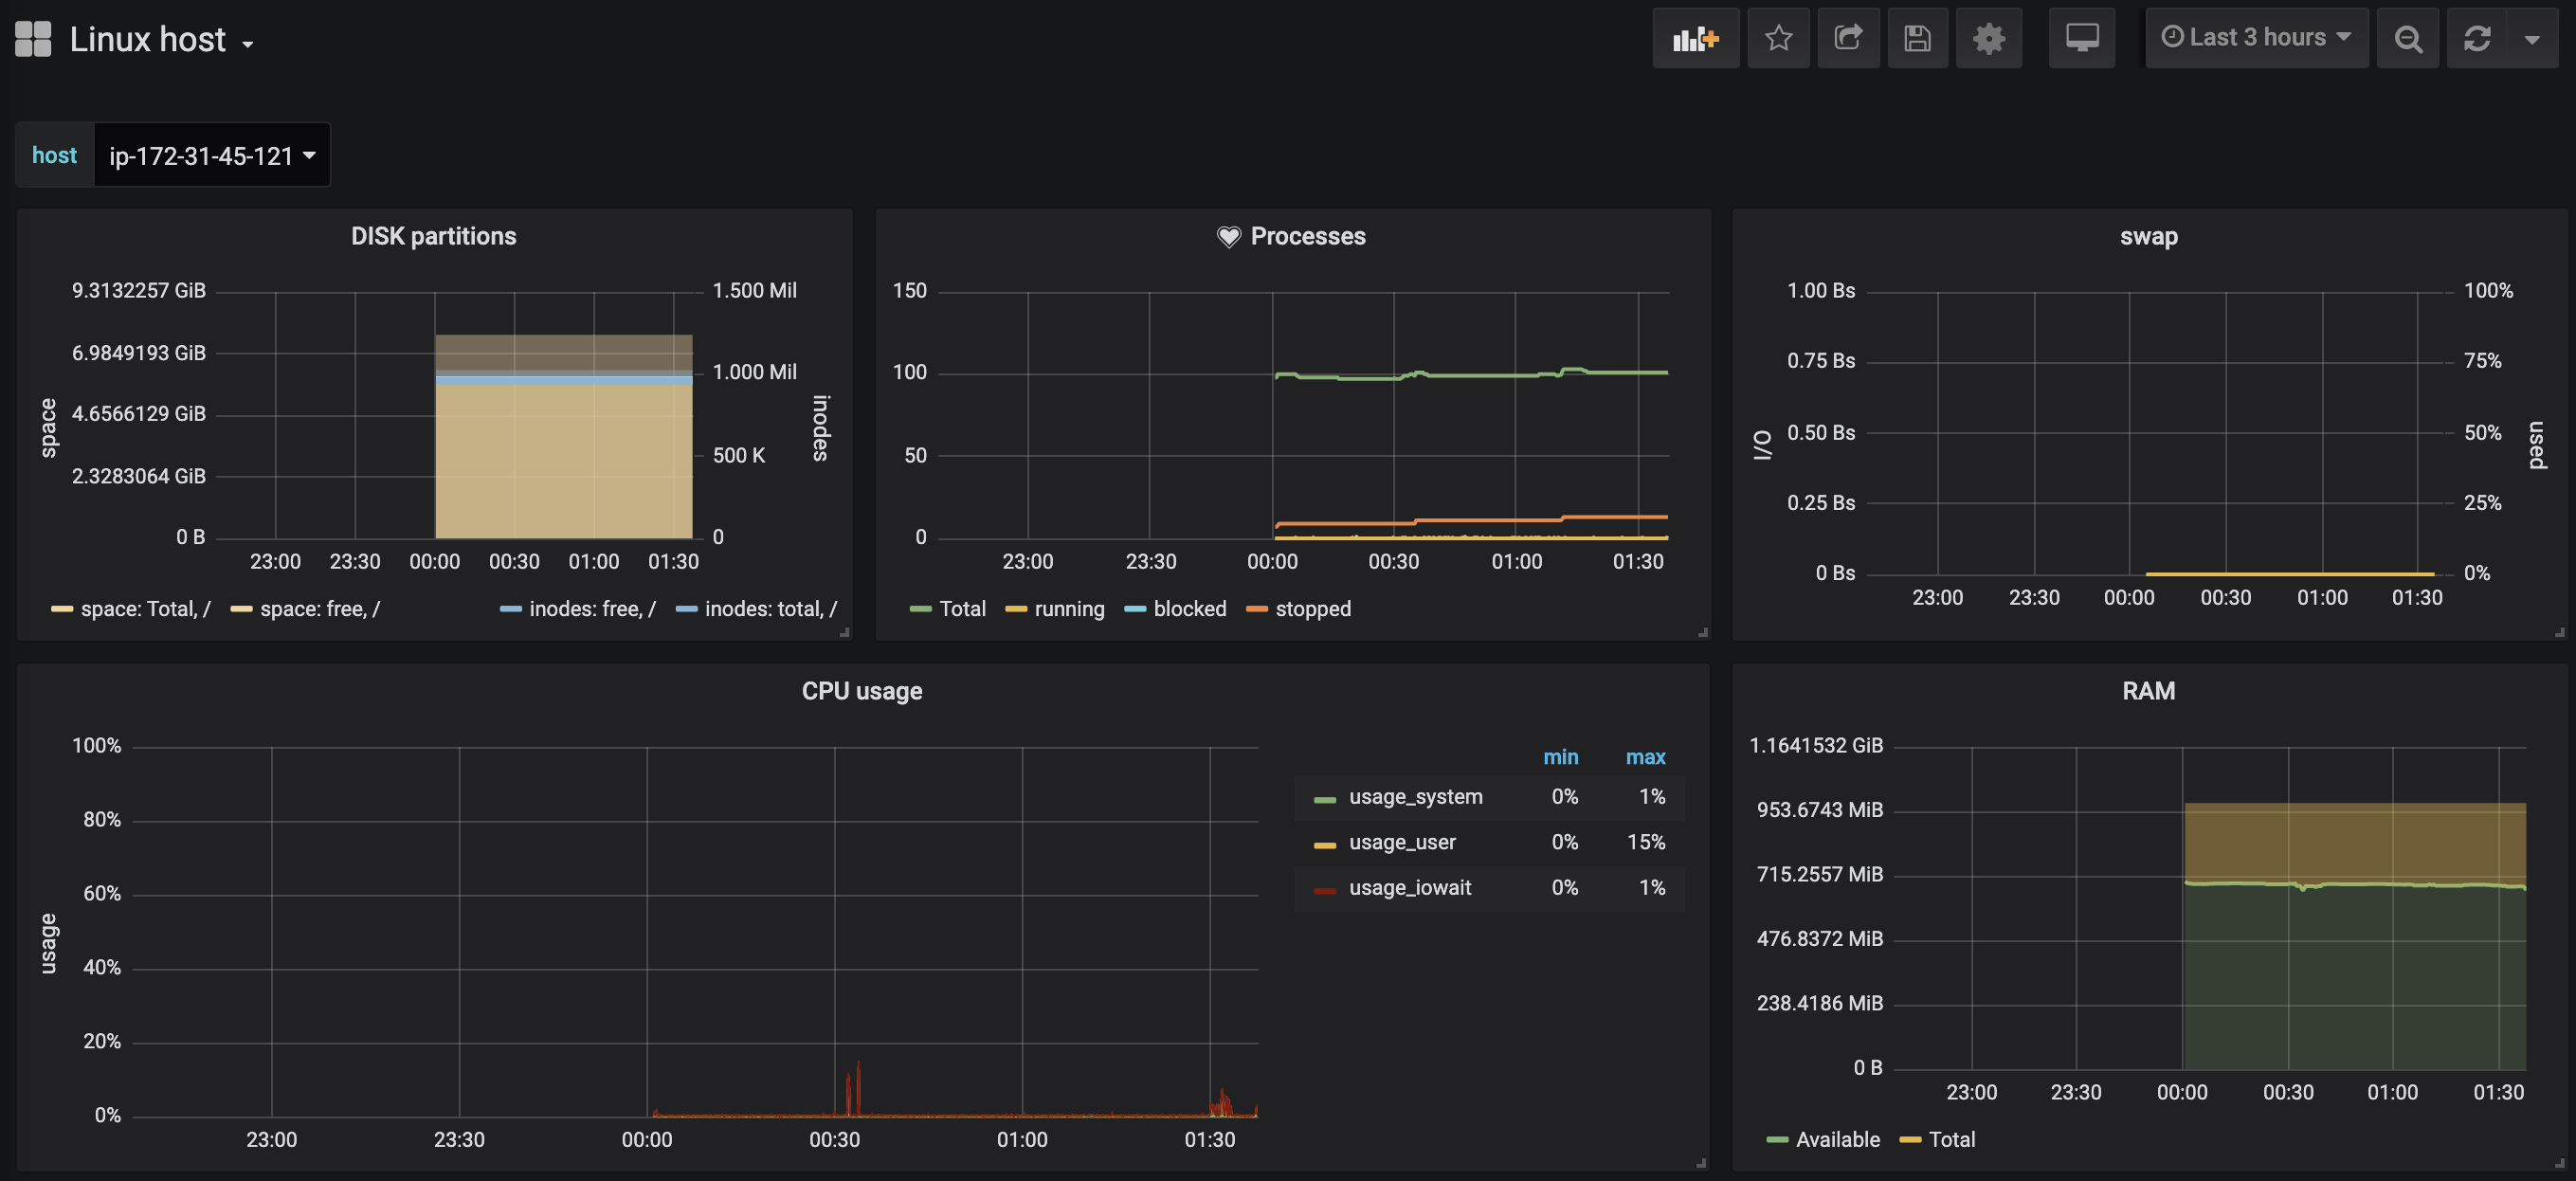
- Telegraf Dashboard Grafana 웹페이지 > Dashboards > Import

- ID는 위의 Grafana Dashboard URL에서 마음에 드는 Dashboard 찾아서 입력(블로그에서 사용하는 Dashboard 링크)

- Name/Folder/Unique identifier (uid): 임의 지정
- servermonitor: InfluxDB
- 커뮤니티 Dashboard를 적용하여 표현

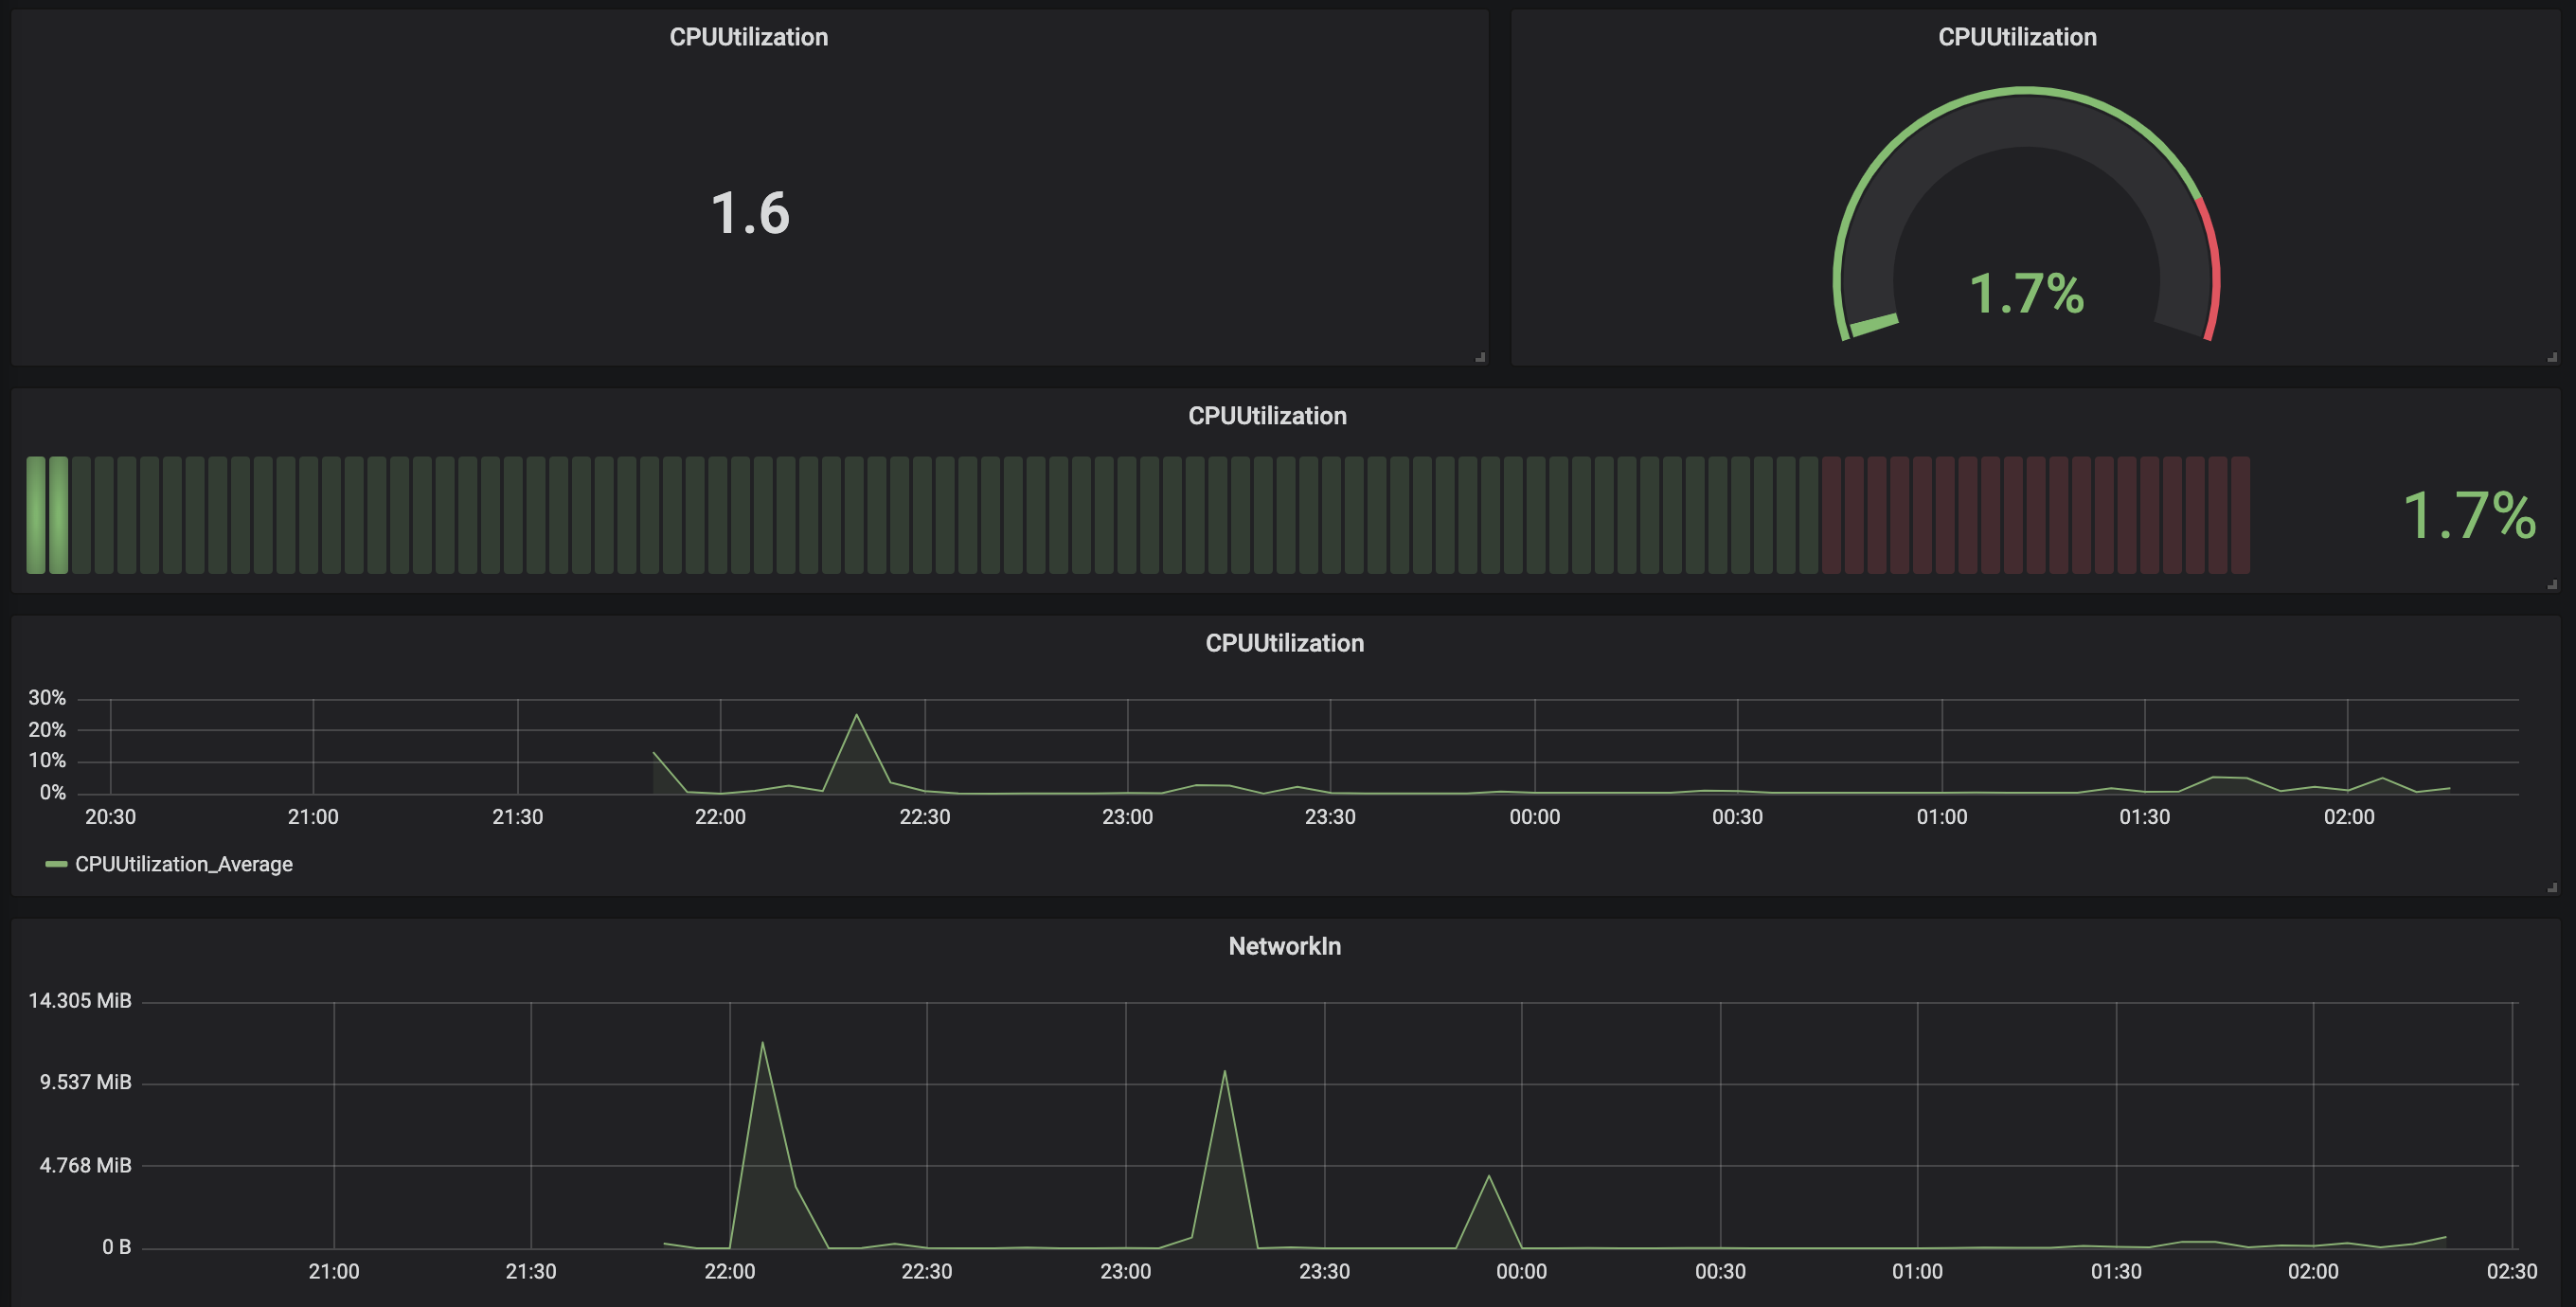
- AWS-CloudWatch Dashboard Grafana 웹페이지 > Dashboards > New dashboard > Add Query

- Query: CloudWatch
- Region: 사용하는 리전 지정
- Metric: 확인하고 싶은 매트릭 지정
- Dimensions: InstanceId = 타겟-InstanceId
- 다양한 차트로 표현

Conclusion
설치 명령어 10줄 정도와 설정 파일 내용을 한두 번 변경하면서 AWS & On-premise 모두를 모니터링할 수 있는 환경의 기초를 마련했습니다. 지금 보여드린 부분은 Grafana, Influxdb, Telegraf, CloudWatch 기능에 극히 일부분 및 모니터링 구성에서 보안 요구 사항이 전혀 반영되지 않은 설정이지만 위와 같이 최대한 간결하게라도 구성을 경험하는데 취지를 두고 작성하였습니다.
다음 포스팅 내용은 아래의 내용들을 정리해서 포스팅 하겠습니다.
- CloudWatch Custom Metric
- Telegraf Plugins
- Granafa & Influxdb 최적화
'IT 이야기 > Open Source' 카테고리의 다른 글
| Kubernetes(K8S) Meetup (0) | 2021.10.13 |
|---|---|
| Kubernetes 기본 개념 (0) | 2021.10.12 |
| Atom Editor (atom 에디터) (0) | 2015.10.28 |
| Python Programming (0) | 2015.10.20 |
| Apache Spark (0) | 2015.10.20 |